Saturday, October 25, 2014

Pokemon Sugar Cookie Tutorial

Here's a little Pokemon cookie Tutorial - if you are looking to make some!


So let's get the tutorial started!!


Start by outlining half of the cookie in red.


Flood the red outline with red royal icing. Let it dry about 10-12 hours. And then pipe the white outline.


Flood the white outline with white royal icing.


Pipe a little black circle of royal icing where the red and white royal icing meet. Let the circle dry for a few minutes. Then you can pipe on the "propellers". That's what I kept thinking of when I was piping them.


The outline of propellers and the circle. When they have dried a little bit, fill them in!


Fill the outline in with black royal icing. Make sure that you let the black circle outline dry for 10-12 hours.


Fill in the little circle with white royal icing.


And they are finished! 

Thanks for looking!!

Wednesday, October 22, 2014

Lego Cookies

It was Lego Movie Night - so I made some Lego cookies for us to enjoy!


Thanks for looking!

Wednesday, September 24, 2014

Fruit Tarts

Oh, how I love fruit tarts!! When I was in college, I went to France with my university and studied French in Lyon for the summer. My friends and I would stop and buy these delicious fruit tarts every day! So every time I see one, I'm taken back in time to France and the Eiffel Tower and anything French. So I decided to make some fruit tarts for myself - unfortunately, it didn't go so well. The recipe that I used was terrible, so I won't post it. But they still turned out cute and reminded me of France.


Thanks for looking!

Tuesday, September 16, 2014

How to make a cookie pencil, without a pencil cookie cutter!

So as you can see, I made some back to school cookies a few weeks ago. I didn't have a pencil cookie cutter - so I came up with one myself. It worked out great and you could even use it to make a crayon cookie (although I would cut the size down).

Now, I should have done this with the actual cookies themselves. But I didn't - so you get a paper/cookie cutter tutorial instead. So, anytime you see the white paper, you have to think of it as the baked cookie

So here's how I did it!


 So here is the rectangle cookie cutter that I used to make the pencil cookies.


 I started by cutting the cookie in half. So there were two pencil cookies, per rectangle cookie cutter.


 Then I took a star cookie cutter and matched the tip of the star, to the size of my cookie.


 Then I punched out my star tip (otherwise known as a triangle).


Then I added the star tip to the pencil body and baked them together. 


 Here is a picture of the real cookie baked together.


And what it looks like completely done. And if you notice, you can see where the cookies were joined underneath the royal icing!

Thanks for looking! Happy baking!

Wednesday, September 3, 2014

Back to School Cookies

It's that time of year... that special time of year... when our kids finally go back to school!

To celebrate - I made cookies! We gave three to his teacher and the rest to the office staff.


Thanks for looking!

Sunday, August 31, 2014

Blue Velvet Double Doozies! Recipe included!

Who doesn't love a good Double Doozie?

Well, now you can have a Blue Velvet Double Doozie! They are so simple and easy to make!


Ingredients:

1 Duncan Hines Blue Velvet Cake Mix
2 eggs
3/4 cup of shortening

Frosting:
Any vanilla frosting - you can buy it from the store or just make your own!

Instructions:
Preheat your oven to 350. Combine all the ingredients. Mix until well blended. Roll cookie dough into little balls and place onto a  cookie sheet lined with parchment paper. Bake for 9-10 minutes.

- I rolled my cookies to 17 grams each. And I baked them for 9 minutes on 325.

Let them cool and then match the cookie shapes up. Lay a cookie on it's top. Frost the bottom of the cookie. And then put another cookie on the frosting. And viola, you have your Blue Velvet Double Doozie!!

Thanks for visiting!

Thursday, August 21, 2014

Emergency royal icing cookie fix

So when I was making these life jacket cookies, I just outlined the cookie and then flooded it. I totally forgot that I was supposed to pipe one side of the cookie vest and let it dry, and then pipe the other side of the cookie vest, to form the line down the center of the cookie where the life jacket connects.

So because I forgot, I had to figure out how fix it. Here are some emergency cookie fixes, in case you ever need them.


Left to right: cookie A, B, C

Cookie A: As you can see, I piped a line down the center to form the two sides of the life jacket. 

Cookie B: I let the cookie dry a little bit and then I used floss and imprinted the line into the royal icing. 

Cookie C: I had one cookie left that I didn't pipe wrong. So I actually piped this guy the right way. I outlined the vest. Piped the right side. Let it dry a little bit. And then piped the left side. So it formed the correct line that I needed. 

Hope this helps!!

Saturday, August 9, 2014

Naked Cake

So the trend this year is having a "naked" cake. My cake wasn't supposed to be naked. But I ran out of time to do what I wanted to do - so ta da!

Here's my first naked cake.


It was a lemon cake with luscious lemon frosting topped with fresh strawberries and blueberries. 


Top view!


Fun view!

Thanks for looking!

Saturday, July 19, 2014

Chocolate Lobster Suckers!

So we are heading to the beach this week for our vacation! I decided that the kids should have some little chocolate lobster suckers to enjoy when we get there.


This little lobster is sitting in brown sugar. 


And these little lobsters are standing up! 

Thanks for looking! 

Friday, July 18, 2014

Gone Fishin'

So for Father's Day - I made these cute little Fisherman cookies. And of course, our Dad's loved them!


Quick close up.


Here's the set up!


Set of cookies!! 


 Bagged and tied up!


And then boxed up to celebrate Father's Day!

 Thanks for looking!

Wednesday, July 16, 2014

Cake Photography Set up

So here's how I took the pictures of my beach cake (posted yesterday)!


Hope this helps!

Thanks for looking!

Tuesday, July 15, 2014

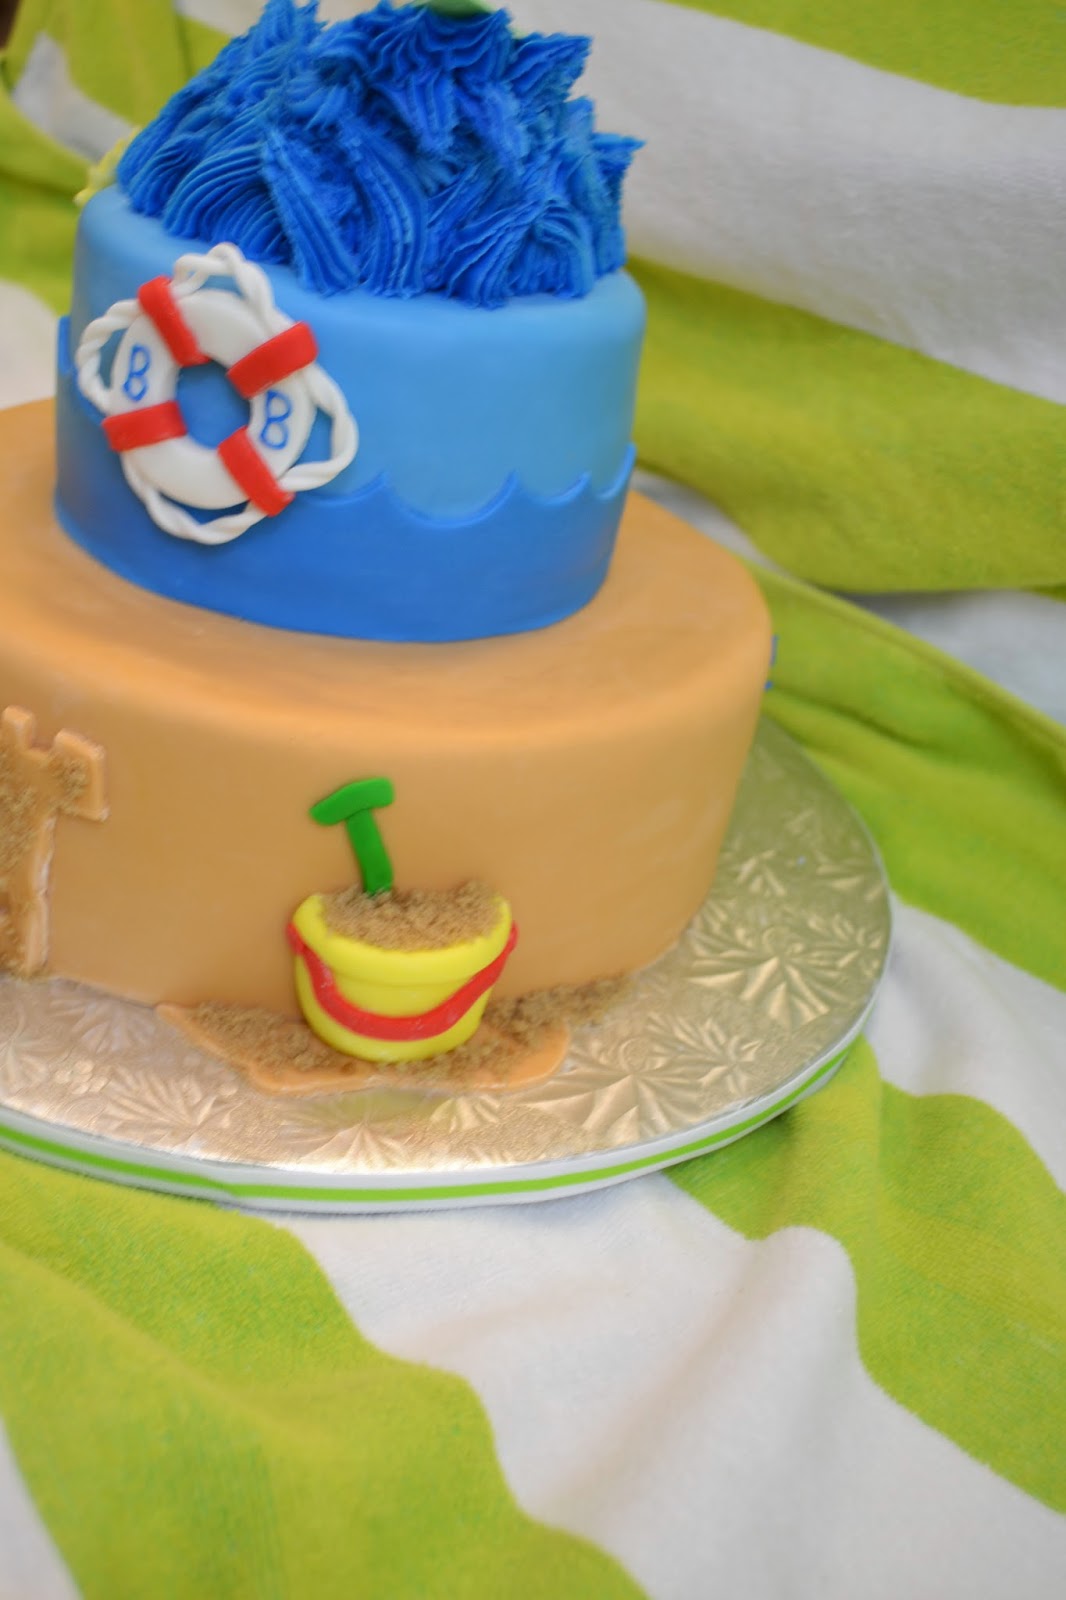
Beach Cake!!

Well, my son just graduated from Kindergarten! And to celebrate they had a beach party! So, guess who made the cake?!?

So here it is!


The cake!


Sand castle time!


Playing in the sand!


Catching some sun!


We are safe. We have a life preserver! 


The back of the cake, although, a little plain, says it all.

Thanks for looking!!

Saturday, June 28, 2014

Tuxedo Chocolate Chip Cookies with Vanilla Frosting

So, as you know by now, I make chocolate chip cookies with vanilla frosting on top. I usually make them with milk chocolate chips because that's my favorite. But today, I made Tuxedo Chocolate Chip cookies - which means they are made with semi sweet chocolate chips and white chocolate chips. Super cute and super yummy!


If you look closely, you can see a few of those white chocolate chips. 

Thanks for looking!

Tuesday, June 24, 2014

Lamb Cake

I found this cute little lamb cake on pinterest. And I decided that it would be perfect for a kids cake decorating class. And sure enough, it was!


This is the fake cake that I made to advertise the class.


And here are the cakes that my students made. 

Thanks for looking!

Monday, June 16, 2014

Peanut Butter Fudge

Oh me, oh my... I need some fudge!!

And today, it's PB!


Thanks for visiting!!

Monday, June 9, 2014

Sweet Birthday Cupcakes... for me!

So fortunately, or unfortunately, depending on how you see it, I had a birthday. And of course I celebrated by making my own treat! Hello, yummy cupcakes!!


Thanks for visiting!

Thursday, June 5, 2014

Coconut Tarts

So if you know me, you know that I LOVE coconut ANYTHING!!!  I'm gaga for coconuts! So my friends all told me to make a fruit tart - and instead, I made some coconut tarts. And they were delicious. (I will post the recipe soon. But since I'm in a hurry right now, I'm just posting pictures).


Dough

Push the dough into the tart pan. Trim the excess dough off. And then prick the bottom with a fork, several times. And get ready to bake them!!

Mix your ingredients!

Scalded milk. 

Add the first mixture to your second mixture!


Fill those tarts with your coconut custard! And put them in the fridge! 


Make your cream from heavy whipping cream! And a swirl and top with coconut. (You can toast your coconut in the oven, but I don't like it like that). 


 Decorated coconut tarts!


My little tart in it's box! 


Just super cute!